
May 26, 2009
Weber Smokey Mountain Cooker Smoker Assembly
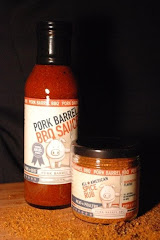
Pork Barrel BBQ recently acquired two Weber Smokey Mountain Cooker Smokers for use in several upcoming events we'll be participating in. Over the Memorial Day Weekend I put mine together and tried it out for the first time. The following post hits on the highlights of assembling the Weber Smokey Mountain Cooker Smoker.
The Smokey Mountain Cooker Smoker comes in a large box and is relatively easy to assemble. It took me about 25 minutes to go from an unopened box to a smoker that was ready for service.
The Smokey Mountain Cooker Smoker comes in a large box and is relatively easy to assemble. It took me about 25 minutes to go from an unopened box to a smoker that was ready for service.

The first step in the assembly of the smoker is to attach the three legs to the heat shield that goes under the smoker - this is a heat shield and not an ash catch.

Next you attach the bottom of the smoker to the three legs and heat shield.
 After you've installed the legs to the bottom of the smoker install the charcoal grate and ring.
Next put the body of the smoker onto the base of the smoker.

 Next put the first of the two grill grates into the smoker.

 Place the lid onto the smoker and you have a finished product!
 The Finished Product with its protective cover!


Next you install four brackets to the inside of the base and place the water bowl inside the base.
 Next put the first of the two grill grates into the smoker.
The final step is putting the second grill grate into the smoker.
 Place the lid onto the smoker and you have a finished product!The Finished Product with its protective cover!
 We have heard nothing but great things about the Weber Smokey Mountain Cooker Smoker and can't wait to try ours out. Check back soon for a post on how the maiden smoking with our new grills went.

Subscribe to:
Post Comments (Atom)

No comments:
Post a Comment